
The Ultimate Guide to Surviving the Examination Roblox Chimera Boss Fight
Master the Examination Roblox Chimera encounter with our comprehensive guide. Learn boss mechanics, lore, phase transitions, and survival strategies.
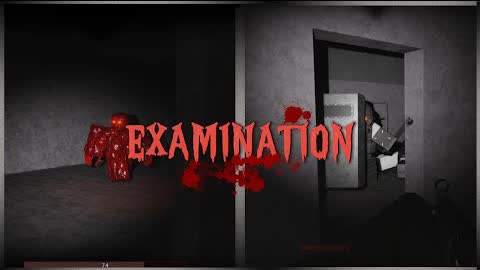 Gameplay videoMaster the Examination Roblox Chimera encounter with our comprehensive guide. Learn boss mechanics, lore, phase transitions, and survival strategies.YouTube
 As you descend into the dark, irradiated depths of the popular horror game, surviving the terrifying examination roblox chimera becomes your ultimate test of skill. This monstrous, bio-mechanical threat represents one of the most brutal encounters in the game, punishing unprepared squads with instant executions and devastating area-of-effect attacks. To help you conquer this nightmare, we have compiled this comprehensive guide detailing everything you need to know about the examination roblox chimera, from its tragic lore to its deadly combat phases.
Whether you are a solo survivor trying to navigate the dark hallways or part of a coordinated tactical squad, understanding this boss is key to your survival. Let's dive deep into the origins, mechanics, and strategies required to defeat one of the most notorious hostiles on the official Roblox platform today.
The Tragic Lore of Kayden Troy
Delving into the lore of the examination roblox chimera reveals a tragic story of a soldier betrayed by circumstances. Before becoming the mutated beast that stalks the facility, the Chimera was a human named Kayden Troy. Troy served as a commander within the Amordian Menlo Special Terrain and Operations Command (MSTOC), an elite special forces division of the MGF.
When the devastating WE-30 outbreak occurred at the Itagura Nuclear Power Plant, Troy and his four-man squadron were deployed in the first wave. Their objective was simple: evacuate survivors and eliminate any hostiles. Troy was equipped with a prototype military exoskeleton, which he personally modified for field testing.
Unfortunately, the mission went horribly wrong. After splitting from the main infantry force to complete a sub-mission, Troy’s squad faced insurmountable obstacles and suffered total casualties. Only Troy and his pointman, Gilbert Barren, survived the initial onslaught, but they could not escape the WE-30 virus.
As Troy succumbed to the infection, the high radiation levels of the Itagura plant glitched his exoskeleton, disabling its built-in self-destruct safety feature. Over time, the virus fused his living tissue directly into his armor and suit. His lower jaw and mouth melted into his gas mask, forcing his mandible to split in half to accommodate the respirator. Today, he roams the facility as a mindless, blood-dripping bio-weapon, turned against the very men he once led.
Spawn Mechanics and the Terror Radius
Understanding how the examination roblox chimera spawns is critical for managing your time during a run. He does not start the match on the map; instead, his arrival is tied to player progression and specific environmental triggers.
| Spawn Parameter | Detail |
|---|---|
| Trigger Event | Activation of the basement valve |
| Spawn Delay | 12 minutes post-activation |
| Arrival Warning | Site-wide alarm and a map-wide screech |
| Post-Death Respawn | 8 minutes and 45 seconds |
| Target Priority | Human players and Sector 3 RIF (ignores other infected) |
Once the Chimera enters the map, he continually emits a faint white light and produces heavy, metallic footsteps that echo through the corridors. If you are nearby, you will know it long before you see him.
The Terror Radius (30 Studs)
The Chimera possesses a passive terror radius of approximately 30 studs. Entering this zone triggers immediate sensory feedback:
- The custom tension soundtrack "HUNTING GROUNDS" begins to play.
- The player's vision darkens significantly around the edges.
- Visual anomalies known as phosphenes (glowing light patterns) appear on the screen.
- Both the audio distortion and phosphene density intensify as the distance between you and the boss decreases.
Attack Patterns and Combat Mechanics
The Chimera is a highly agile combatant that utilizes his prototype exoskeleton to close distances and punish defensive playstyles. He features four distinct active attacks, a defensive clash, and a taunt mechanic.
Chimera Attack Matrix
| Attack Name | Damage | CC Effect | Countermeasure |
|---|---|---|---|
| Slash | 19 (Phase 1) / 32 (Phase 2) | None | Keep distance, dodge backward |
| Dropkick | 29 | Ragdoll | Take cover behind walls/objects during wind-up |
| Electrical Surge (AoE) | 50 (1st wave) / 10 (2nd wave) | Knockdown | Run outside the radius when he slams his fist |
| Execution Warp | Instant Death | Execution | Break line of sight/take cover during the charge sound |
[Visualizing Chimera's Attack Flow]
       │
       ├─► Player Close? ──► Slash (Fast, repetitive melee)
       ├─► Player in Line of Sight? ──► Dropkick (Static wind-up, lunges)
       ├─► 3+ Players Grouped? ──► Electrical Surge (Fist slam, AoE knockdown)
       └─► Player Unobstructed? ──► Execution Warp (Teleportation execute)
Advanced Defensive Mechanics
In addition to his offensive capabilities, the Chimera has unique behaviors designed to counter common player tactics:
- Clashing: If a player attempts to bash the Chimera to stun him, he will reflect the impact. Instead of being stunned, he clashes with the player, dealing 10 damage back to them.
- Bullet Dodging: Thanks to his high-tech exoskeleton, the Chimera can enter a temporary "dodge state" when fired upon, significantly reducing all incoming bullet damage.
- Taunting: When shot, there is a random chance he will stop to mock the player. He will emit a deep, pitch-down laugh and beat his chest plate twice. During this animation, he is completely immune to all damage.
Phase 2: The Enraged State and Last Stand
Handling the examination roblox chimera during its furious second phase is where many squads fail. The fight shifts dramatically once his health drops below 50%.
Phase Transition Stats
| Attribute | Phase 1 (Above 50% HP) | Phase 2 (Below 876 HP) |
|---|---|---|
| Movement Speed | 18 | 27 |
| Slash Damage | 19 | 32 |
| Aura & Claws | Glows White | Glows Bright Red |
| Behavior | Tactical stalking, dodging | Relentless pursuit, roaring |
When his health falls below 876, he will stumble momentarily and drop to his knees. After a brief recovery window, he stands back up and lets out a terrifying, map-wide roar. Players must use his transition animation to back away and prepare for his massively buffed movement speed.
The Axe Last Stand Mechanic
If you are cornered and about to face execution, a specific inventory item can save your life:
- Requirement: You must have a melee Axe in your inventory.
- Trigger: You receive a fatal blow that would normally initiate his execution animation.
- Action: Your character automatically fights back with the Axe, delivering a brief stun to the Chimera.
- Cost: The Axe is permanently consumed and removed from your inventory.
- Community Report: According to player experience, this mechanic can occasionally glitch and fail to trigger, so do not rely on it as a primary strategy.
The Self-Destruct Sequence
Defeating the Chimera is not the end of the danger. Upon reaching zero health, he interacts with his damaged exoskeleton interface. A few seconds later, the suit detonates in a massive, map-wide explosion.
Crucial Warning: Do not stand near his body during his death animation. The resulting explosion deals instantaneous, lethal damage to any players caught within its immediate radius.
Strategic Guide: How to Defeat the Chimera
Mastering the examination roblox chimera encounter requires disciplined coordination, stamina management, and spatial awareness.
Step-by-Step Tactical Approach
- Gear Up Appropriately: Prioritize fast-firing weapons and high-mobility loadouts. Bring plenty of healing supplies and at least one Axe per player for insurance.
- Kiting and Stamina Conservation: Never deplete your stamina bar completely. You need to keep a reserve pool to run and dodge when you hear his static dropkick wind-up.
- The "Two-Hit" Rule: When fighting him head-on, wait for him to miss an attack, step in to land two to three quick strikes, and immediately back away. Greedy players who try to land four or more hits will get caught by his rapid slash counterattacks.
- Squad Coordination: In co-op play, assign one player with high mobility to act as "bait." While the Chimera focuses on chasing the bait, the remaining players should flank him and strike from behind.
- Using the Environment: You can completely avoid his Dropkick and Execution Warp by ducking behind solid walls, pillars, or large crates when you hear their respective audio cues.
Exploiting Pathfinding Weaknesses
According to community reports and player experiences, the Chimera's pathfinding AI struggles around certain map geometry. Specifically, he cannot easily navigate around the sandbags and wooden pallets located near the Sector 1 entrance.
While he can still enter the area if he decides to charge directly at you, players have successfully used this spot to safely solo the boss using high-sustain classes like the Medic.
Trivia and Design Details
The examination roblox chimera has several visual and audio details that help players recognize its attack states.
| Feature | In-game detail | Combat significance |
|---|---|---|
| Split Mandible | The lower jaw opens beneath the torn mask | Signals the altered anatomy |
| Exoskeleton & Claws | Heavy armor surrounds its primary claw arm | Explains its strong frontal protection |
| Dogtags on Wrist | Multiple tags hang from the wrist armor | Adds a distinctive silhouette |
| Audio & Voicelines | Distorted radio orders play during the encounter | Warns that an attack phase is starting |
| Taunt Laugh | A lowered, distorted laugh interrupts combat | Creates a brief cue before movement resumes |
- Lore Details: Canonically, Kayden Troy is left-handed, which is why his combat claws are situated on his left arm. He is also canonically an atheist.
- Helmet Detail: His red helmet features the hand-written phrase "MY ARMOR IS BETTER THAN YOURS!" This is reflected in-game, as his head is completely armored and cannot be destroyed by gunfire.
- Admin Customization: While the red-glowing variant is the only one that spawns naturally, game administrators can spawn blue and purple variants of the Chimera. These alternate colors are purely cosmetic and do not alter his base stats.
Frequently Asked Questions
How do I trigger the examination roblox chimera spawn?
The Chimera spawns exactly 12 minutes after players activate the valve located in the basement area. His arrival is signaled by a loud, facility-wide alarm and a distinct screech.
Can you stun the Chimera by bashing him?
No. Bashing the Chimera will trigger a "clash" mechanic. He will block the bash, remain unstunned, and reflect 10 points of damage back to the player.
What happens if I have an Axe in my inventory when I die?
If you have an Axe and are about to be executed at low health, your character will automatically use it to strike back. This stuns the Chimera briefly and gives you a chance to escape, though it consumes the Axe from your inventory.
Can the Chimera attack other infected on the map?
No, the Chimera ignores all common infected. He only targets human players and the RIF factions located within Sector 3.
Conclusion
Conquering the examination roblox chimera is a badge of honor for any Roblox horror fan. By understanding his tragic background, memorizing his distinct audio cues, and executing precise counter-strategies, you can turn this terrifying boss fight into a manageable, structured victory. Keep your distance, manage your stamina, keep an Axe in your inventory, and always run when you hear that bone-chilling Phase 2 roar!
Related Guides
Defeating the Examination Roblox Sin Boss: Strategies for Rasonian Infantry Forces
Master the fight against the Examination Roblox Sin boss with our comprehensive guide on mechanics, phases, and expert combat strategies.
Examination Roblox All Enemies Guide: A Complete Bestiary for Every Hostile Encounter
Master the battlefield in Examination. Explore our guide on Examination Roblox all enemies, including breakdowns of Virals, Rasonians, and deadly bosses.
Examination Roblox Lurker Guide: How to Survive the Most Common Enemy
Master the Examination Roblox Lurker with our comprehensive guide on spawns, combat mechanics, and survival strategies for this common enemy.
Surviving D-Zero: A Comprehensive Guide to the Examination Roblox D Zero Boss and Lore
Master the encounter with D-Zero in Examination Roblox. Learn about spawn rates, combat behavior, Yuri’s Challenge, and the lore behind this rare enemy.