
Mastering Examination Roblox Sector 2: The Ultimate Survival and Progression Guide
Navigate the dangers of the Itagura NPP with our comprehensive guide to Examination Roblox Sector 2, covering keycards, puzzles, and the Elephant's Foot.
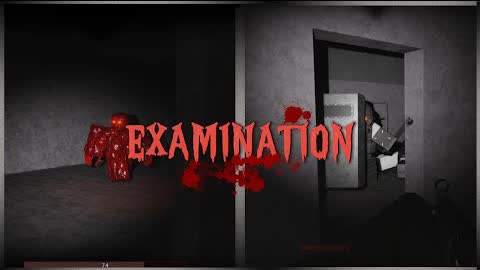 Gameplay videoNavigate the dangers of the Itagura NPP with our comprehensive guide to Examination Roblox Sector 2, covering keycards, puzzles, and the Elephant's Foot.YouTube
 Navigating the Horrors of the Itagura NPP
Roblox has become a hub for high-intensity survival horror experiences, and few titles capture the atmospheric dread of a nuclear meltdown quite like Examination. As players delve deeper into the Itagura NPP, the difficulty spikes significantly, making it essential to understand the mechanics of examination roblox sector 2. This area represents a major turning point in the game, moving players away from the relatively safe lobby and into the heart of a radioactive nightmare.
Success in examination roblox sector 2 requires more than just quick reflexes; it demands a thorough understanding of the facility's layout and the specific sequence of operations needed to progress. Whether you are avoiding the lethal gaze of the Elephant’s Foot or hunting for the elusive blue keycard in the logistics wing, every step counts. In this guide, we will break down the essential strategies, room locations, and survival tips to help you conquer one of the most challenging maps on the platform.
The Foundation: From the Lobby to Sector 1
Before you can even think about entering Sector 2, you must survive the initial breach into the facility. The Itagura NPP entrance is a grim staging ground, often described by the community as smelling like death. While the initial lobby offers a temporary reprieve—a place where the infected and the dreaded Chimera are physically blocked from entering—this safety is short-lived.
Once you move past the decontamination showers, the real game begins. Sector 1 introduces players to the primary mechanics of the game: pump activation and generator management. You will encounter Private Dice’s Hallway, a somber reminder of the facility's toll, before reaching Generator Pump #1. Activating this pump is your first major milestone, triggering environmental cues that signal the basement is now accessible.
Sector 1 Key Milestones
| Location | Primary Objective | Hazard Level | Key Notes |
|---|---|---|---|
| Lobby | Gear up at the locker room | Low | Infected cannot enter this zone. |
| Decontamination | Transition to Sector 1 | Medium | The Chimera is blocked at the showers. |
| Pump #1 | Activate the first generator | High | Essential for opening the basement door. |
| Dice's Hallway | Navigation | Medium | A common path for early-game hostiles. |
The Reactor 4 Basement: A Lethal Prerequisite
To gain access to examination roblox sector 2, players must first descend into the Reactor 4 basement. This area is arguably the most atmospheric and dangerous section of the early game. After the first pump is active, a distinct beeping sound will guide you toward the basement entrance.
The basement is not merely a hallway; it is a puzzle box filled with lethal hazards. The most famous of these is the "Elephant's Foot." Based on the real-world radioactive mass at Chernobyl, the game version is equally unforgiving. Community reports emphasize a strict "DO-NOT-LOOK" policy. If your camera catches a direct glimpse of the Elephant's Foot, your character will die almost instantly. Navigating the room to reach the Basement Valve requires looking at the floor or walls to avoid the radiation's influence.
Surviving the Elephant's Foot Room
- Locate the Backup Generator: Before tackling the valve, ensure the backup power is running. Note that this does not count toward your main generator total but is required for basement progression.
- Read the Warning Notes: A hazmat operative is stationed near the entrance to the radioactive zone. Beside him, a radiation warning note provides lore and mechanical hints.
- The Valve Maneuver: You must interact with the valve to unlock the "Yellow Sector," which houses Reactor Pump 2.
- Avoid Visual Contact: Keep your character's gaze away from the central radioactive mass at all times.
Unlocking Examination Roblox Sector 2
Once the Reactor 2 valve has been turned in the basement, the path to examination roblox sector 2 finally opens. This transition is marked by a heavy door that grants access to the Restricted Sub-sector. Entering this area shifts the gameplay from pure survival to a mix of stealth, exploration, and technical interaction.
Sector 2 is significantly larger than the previous areas and introduces more complex room-clearing requirements. Players will find themselves navigating through logistics hubs, control rooms, and armories. The transition into this sector is a major achievement for any player, as it signifies that you have mastered the basic mechanics and are ready for the facility's deeper secrets.
Sector 2 Navigation Checklist
| Step | Action | Location | Result |
|---|---|---|---|
| 1 | Turn Reactor 2 Valve | Basement | Opens Sector 2 Entrance |
| 2 | Locate Control Room Laptop | Far Left Room | Unlocks Control Room access |
| 3 | Toggle Emergency Shutters | Control Room | Opens the Emergency Exit |
| 4 | Toggle Logistics Shutters | Control Room | Opens Sector 2 Logistics |
Key Locations Inside Sector 2
Once you are inside examination roblox sector 2, your priorities change. You are no longer just trying to survive; you are trying to find the tools necessary to reach Sector 3. The layout here is designed to confuse players under pressure, so memorizing the following key locations is vital.
The Armory (S2)
Every survivor needs firepower. The Sector 2 Armory is a high-value room that contains a P95 and essential ammunition. In a game where the infected become increasingly aggressive, having a reliable sidearm is the difference between a successful run and a quick trip back to the lobby.
The Control Room
The Control Room serves as the "brain" of Sector 2. However, you cannot simply walk in. Players must head to the furthest room on the left to find a laptop discarded on the floor. Interacting with this laptop grants the permissions needed to use the buttons inside the Control Room. Once inside, you can manage the Emergency Exit and the Logistics Shutters.
Sector 2 Logistics
This is the most critical area for progression. The Logistics wing is a sprawling zone that houses the Gate-1 Area. Your primary goal here is to find the blue keycard. Without this card, you cannot proceed to the upper levels of the facility.
Sector 2 Room Data
| Room Name | Key Items | Purpose |
|---|---|---|
| Armory | P95, Ammo | Combat Readiness |
| Control Room | Shutter Controls | Pathfinding & Shortcuts |
| Logistics (Gate-1) | Blue Keycard | Progression to Sector 3 |
| Restricted Sub-sector | Lore Notes | Narrative Context |
The Path to Sector 3: The Blue Keycard Puzzle
The final hurdle within examination roblox sector 2 involves a multi-step process to unlock Sector 3. This is where many players get stuck, as the game requires you to backtrack through the Logistics area once you have the proper clearance.
After obtaining the blue keycard from the Gate-1 area, you must locate a specific staircase within the Logistics wing. This staircase leads to a door equipped with a card reader. Using the blue keycard here grants access to a small office containing a second laptop. Interacting with this laptop is the final trigger required to open the doors to Sector 3.
Player experience suggests that this area is often patrolled by high-level hostiles. It is recommended to clear the surrounding hallways before attempting to use the card reader, as the animation can leave you vulnerable for a few seconds.
Tactical Tips for Success
Navigating the complex corridors of examination roblox sector 2 is a daunting task. To improve your chances of survival, consider these community-vetted strategies:
- Listen for Audio Cues: Doors in this game often make distinct beeping sounds when unlocked. If you interact with a laptop or valve, listen closely to identify which door has opened.
- Manage Your Light: The facility is dark, but using your flashlight constantly can attract unwanted attention. Use environmental lighting whenever possible.
- Team Coordination: If playing in a group, designate one player as the "Tech Specialist" to handle laptops and valves, while others provide cover fire.
- The Buzzer Trivia: Long-time players may remember a time when the Chimera (previously known as Flare) would die instantly if it tried to enter the spawn area, accompanied by a loud "Incorrect Buzzer" sound. While these exploits are largely patched, understanding the boundaries of enemy AI is still crucial.
For more information on the development and community updates for this game, you can visit the official Roblox website to stay informed on the latest patches and map changes.
Sector Summary and Progression
| Feature | Details |
|---|---|
| Main Objective | Unlock Sector 3 via the Blue Keycard |
| Primary Hazard | Radiation and Infected Patrols |
| Key Tool | P95 (Found in Armory) |
| Critical Interaction | Control Room Laptop |
As you move through the facility, remember that the environment is just as dangerous as the monsters. The "Elephant's Foot" in the basement and the restricted zones in Sector 2 are designed to punish players who rush. Patience, observation, and a steady hand are your best assets.
Final Thoughts on Sector 2
The journey through examination roblox sector 2 is a test of both knowledge and nerves. By mastering the sequence of pump activations, valve turns, and keycard swipes, you move one step closer to uncovering the mystery of the Itagura NPP. Sector 2 acts as a bridge between the introductory challenges of the entrance and the high-stakes combat of Sector 3, where the MGF must clear out the Rasonian threat.
Stay alert, keep your eyes off the radioactive core, and always ensure your P95 is loaded before entering the Logistics wing. The darkened walls of the NPP have claimed many soldiers; don't let yourself be the next one.
Frequently Asked Questions
How do I open the Sector 2 Control Room?
To open the control room, you must first locate a laptop sitting on the floor in the furthest room to the left of the sector. Interacting with this laptop provides the necessary clearance to enter the control room and operate the shutter buttons.
Where is the blue keycard located in examination roblox sector 2?
The blue keycard is found within the Sector 2 Logistics area, specifically in the Gate-1 section. Once you have this card, you can use it on the card reader at the top of the Logistics staircase to access the final laptop required for Sector 3 progression.
What happens if I look at the Elephant's Foot?
Looking directly at the Elephant's Foot in the basement will result in immediate death. Players must navigate the room by looking at the floor or walls to avoid the lethal radiation levels emitted by the object.
What is the best weapon to use in Sector 2?
While various weapons are available, the P95 found in the Sector 2 Armory is a highly recommended choice for its reliability and the availability of ammo within the sector itself. It provides the necessary stopping power to handle the infected you will encounter in the Logistics and Control areas.
Related Guides
Complete Guide to Navigating the Examination Roblox Sector 4 and Beyond: Map Mastery
Struggling with the layout of Itagura NPP? Our guide covers the Examination Roblox Sector 4 navigation, basement mechanics, and essential survival tips.
Mastering the Examination Roblox Map: A Comprehensive Guide to Itagura NPP
Navigate the dangerous halls of the Itagura NPP with our ultimate guide to the Examination Roblox map. Learn sector secrets and survival tips.
Mastering the Examination Roblox Sector 3 Map: A Complete Survival Guide
Struggling to reach or survive in Examination Roblox Sector 3? This guide covers key progression steps, map layouts, and essential tips for your run.
Mastering the Examination Roblox Tunnels Map: A Complete Survival Guide
Struggling to survive the Examination Roblox Tunnels map? Discover secret entry methods, survival tips, and strategies to outrun HIM in this guide.